Turn a logo, drawing or silhouette into a 3D-printable model. Extrude the shape or turn brightness into height, see the model update as you change the settings, and download it as STL or 3MF.
Drop an image hereRelease to open
or
PNG, JPG or SVG · one image at a time · nothing is uploaded
Preview
Drop another imageRelease to open
It replaces this one; settings reset to default.
Settings
Extrude: the shape at one height. Heightmap: light is high, dark is low.
Size of the whole model from left to right, base and loop included. The depth follows the image.
How far the shape stands up, measured from the top of the base.
Pixels darker than this become solid. Auto picks the best cut-off for the image.
Blurs the heights so noise and JPEG blocks do not show as bumps. 0 keeps every detail.
A plate under the shape that joins separate parts into one piece.
Solid material under the darkest point, so the relief has a bottom.
Resolution the image is worked at. Higher gives finer edges and more triangles.
Advanced
Cuts the shape out of a plate instead, e.g. a stencil.
What is cut away around the shape. Auto uses transparency or a plain border colour.
Pick the colour to cut away, e.g. a white background. Click it in the 2D view or choose it here.
How different from the picked colour a pixel may be and still be removed.
Removes specks too small to print.
Parts with less area than this in the finished model are removed.
Thickness of the base plate.
How far the base reaches beyond the shape on every side.
Off: the base is one solid plate behind the shape. On: every hole in the shape goes through the base too.
Adds a ring for a key ring or a cord, joined to the shape.
Which side of the shape the loop goes on.
Diameter of the hole in the loop.
Flips the model left to right, for stamps and prints read from the back.
Writes the STL as text, about four times larger. Only for tools that need it.
Examples
No image at hand? Each example loads its image and settings into the editor.
How it works
Open an image
Drop or paste a PNG, JPG or SVG, or pick an example. It is read in your browser and never sent anywhere.
Shape the model
Choose Extrude or Heightmap, the width in mm, a base or a keyring loop. The 3D preview follows every change.
Download STL or 3MF
The bar under the preview shows the size, the triangle count and whether the model is watertight.
Settings explained
Mode
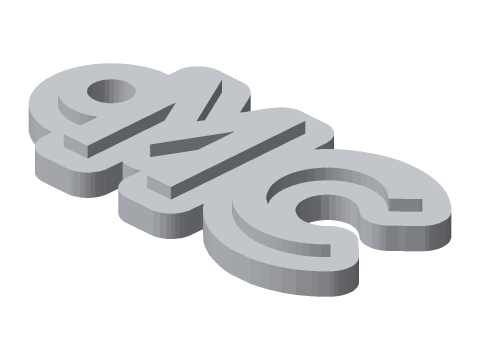
Extrude traces the outline of the shape, holes included, and lifts it to one height: logos, signs, silhouettes and anything else with clear edges. The outline is smoothed, but corners stay sharp.
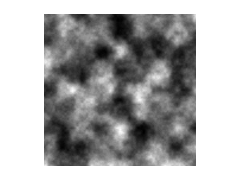
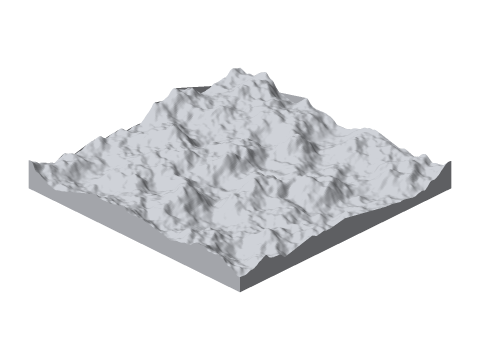
Heightmap turns every pixel’s brightness into a height: white is highest, black lowest. Use it for terrain, textures, embossed patterns and photos you want as a relief. SVG files are always extruded.
The 2D view under the 3D preview shows what the mode reads from the image. In Extrude, what becomes solid is filled in, and the checkerboard shows what is cut away. In Heightmap, light is high and dark is low. Click a colour in the 2D view to remove it as background (see Background).
Width
The model is exactly this wide in millimetres, measured over everything: shape, base margin and keyring loop. The other direction follows the image’s proportions, so nothing is stretched. The size in the preview bar is the size your slicer shows.
Height
In Extrude, the shape is raised this many millimetres above the base (or above the print bed without a base). Two to four millimetres is plenty for most signs and logos.
In Heightmap, this is the difference between black and white: white ends this much higher than black. The minimum thickness comes on top, under the darkest point.
Threshold
Without transparency or a plain background colour, the shape is found by brightness. Auto (Otsu’s method) chooses the cut-off that best separates the dark and light parts of the image, and picks the side that does not touch the image border as the shape, so a light logo on a dark background works too.
Move the slider if thin lines disappear (raise it) or if shadows and noise join the shape (lower it). The setting is not used when the image has transparency or a plain background colour: those decide the shape instead.
Smoothing
Photos and JPEG files are noisy, and every speck becomes a bump in a heightmap. Smoothing averages each point with its neighbours (a Gaussian blur, measured in grid cells) before the heights are set. 1 removes noise and keeps edges crisp; 2–3 suit photos; 0 keeps the grid exactly as sampled.
Base
Off gives only the shape itself: letters and parts that do not touch become separate pieces on the print bed. Rectangle puts a plate under everything, with the margin you set. Outline follows the shape at the margin’s distance, like a sticker’s backing.
If the outline base would touch the shape somewhere (a very small margin around a detailed shape), a rectangle is used instead, and the editor says so.
Minimum thickness
A heightmap stands on a flat bottom. Its darkest point is this thick and everything else is thicker, so there are no holes where the image is black. One millimetre is enough for most prints; use more for large reliefs that must not bend.
Detail
Extrude traces the image at up to 512 px (Low), 1 024 px (Medium) or 2 048 px (High) on its longest side. Medium follows the edges of most logos to well under a tenth of a millimetre at 80 mm width; High is for large prints or fine detail.
Heightmap samples a grid of up to 150, 300 or 600 cells on the longest side, and every cell is two triangles. High can give over half a million triangles and a file of tens of megabytes; the preview bar shows the count and the file size before you download. For SVG, Detail sets how finely curves are divided.
Invert
In Extrude, the empty parts become solid and the shape becomes holes in a plate: a stencil, or a frame around a cut-out. It also helps when Auto picked the wrong side of the image. Turn on «Cut holes through base» as well if the holes should go all the way through a base.
In Heightmap, dark areas become high and light ones low: raised lines from a black drawing on white paper, or a stamp.
Background
Background is what gets cut away, not the colour of the model: STL files have no colour, and you choose the filament in your slicer. Transparent pixels are always background.
Auto uses the image’s transparency when it has any. Otherwise, if the border of the image is one plain colour (a logo on white), that colour is removed. If neither is the case, the shape is found by brightness (see Threshold).
Remove colour cuts away the colour you pick, everywhere in the image, on top of any transparency. It starts with the colour of the image’s corners. Pick another with the colour field (keyboard and screen readers work), type a hex value, or click the background in the 2D view; the checkerboard there shows what is removed. Tolerance sets how different a colour may be and still be removed: raise it for JPEG files with blotchy backgrounds.
Remove small parts
Photos and JPEG files often give specks besides the shape itself: dust, noise and blotches along the edges. With this on, every separate part with less area than the limit in the finished model is removed before the loop and base are added. The limit is in square millimetres, 1 mm² by default, about the smallest dot a printer makes cleanly: specks go, while the dot on an i (several mm² on an 80 mm sign) and other real details stay.
Since the limit is in millimetres, it follows the Width: make the model smaller and more small parts fall under it. Move the slider up to remove larger stray pieces too, such as a strip of the table edge; the last step keeps only the largest part, which is what «Keep only the largest part» under the preview does. Turn it off to keep everything that was traced. Only for images in Extrude: SVG files have no noise, and a heightmap has no parts.
Base thickness
The base plate’s thickness in millimetres. The shape stands on top of it, so the total height is base thickness plus height.
Base margin
The distance from the shape’s edge to the base’s edge, in millimetres. It counts towards the width: a wider margin makes the shape itself a little smaller.
Cut holes through base
By default the base is one solid plate, for both Rectangle and Outline: the middle of an O, the counters of B, 8 and A and every other hole in the shape are closed by the base, so the shape stands on a continuous back that is easy to print and glue or hang.
Turn this on for stencils and other pieces you want to see through: every hole in the shape then goes through the base, with straight walls from top to bottom. Only holes narrower than about 1 mm stay closed, since they would not print open; the editor says how many. Parts inside a hole (the middle of an inverted O) have no base under them then, and print as separate pieces.
The keyring loop’s hole always goes through, whatever this setting is.
Keyring loop
A ring is added outside the shape at the position you choose, overlapping it so the two print as one piece. If the shape is wide at that side, the ring sits in the middle; otherwise at the outermost point. The ring’s wall is half the hole’s diameter, and at least 3 mm, so it holds a key ring. Only in Extrude.
The hole always goes through the whole model, base included. With a base, the base follows the ring at the base margin: a rectangle base gets a round tab, so the loop sticks out from the plate’s edge.
Mirror
Mirrors the model left to right. Use it for stamps, for pieces glued behind glass, and for anything that is read from the other side.
File format
Choose STL or 3MF beside the download button. Binary STL is read by every slicer and is 50 bytes per triangle. 3MF is compressed (usually a fifth of the binary STL) and states that the units are millimetres, so the size is never misread; PrusaSlicer, Bambu Studio, Orca and Cura all open it.
ASCII STL, under Advanced, is the same model as text, about four times larger, for tools that need it.
Extrude vs Heightmap
The tool is best at logos, drawings and silhouettes, where the image clearly says what is shape and what is background. Extrude finds that outline, holes included, and lifts it to one height: every edge stays crisp, and the file stays small. It is what you want for signs, keyrings, nameplates and stencils.
Heightmap ignores outlines and reads brightness instead: every pixel becomes a point whose height follows how light it is. Terrain maps, textures and greyscale art turn into reliefs. An image with only one or two tones (a black logo) gives a flat plate in Heightmap, and the editor says so.
| Property | Extrude | Heightmap |
|---|---|---|
| Reads | Which pixels are shape and which are background | The brightness of every pixel |
| Gives | The outline lifted to one height, on a base if you want | A relief: light areas high, dark areas low |
| Best for | Logos, signs, line drawings, silhouettes, keyrings | Terrain, textures, embossed patterns, greyscale art |
| Holes | Kept (the middle of an O), optionally through the base | Only where the background is removed |
| Keyring loop | Yes | No |
| SVG files | Yes, straight from the paths | No: SVG has no brightness to read |
| Example at Medium | Keyring: 1 600 triangles | Terrain: 180 004 triangles |
FAQ
What kind of image works best?
Logos, line drawings, icons, lettering and silhouettes: anything with clear edges and strong contrast between shape and background. A PNG with a transparent background or an SVG gives the cleanest outline. Photos work when the object stands out from a plain background, such as a tool photographed on a white sheet of paper.
Can I turn a photo of a person or a landscape into a 3D model?
Not as a true 3D shape: a single photo has no depth information. Heightmap turns brightness into height, which gives a relief where dark hair is low and a light sky is high. That suits textures, terrain maps and greyscale art. For a portrait, a silhouette (Extrude) is usually the better print.
How do I make a keyring?
Choose Extrude, set Base to Outline and turn on Keyring loop under Advanced. The loop is joined to the shape at the side you pick, and its hole always goes through the whole model. The «Keyring» example in the gallery loads exactly these settings.
Why does my model have several separate parts?
Letters and shapes that do not touch become separate pieces. Turn on a base (Rectangle or Outline) to stand them on one plate. If the extra parts are specks or a strip of background, «Keep only the largest part» in the hint removes them, and Remove small parts under Advanced sets how small is too small.
Can I get a 3MF file instead of STL?
Yes. Choose 3MF beside the download button and the button changes to «Download 3MF». 3MF is compressed, usually about a fifth of the binary STL, and records that the units are millimetres, so the slicer never misreads the size. PrusaSlicer, Bambu Studio, OrcaSlicer and Cura open it. ASCII STL is under Advanced, for tools that need text.
How big will the printed model be?
Exactly the Width you set, from left to right, with base and loop included; the depth follows the image’s proportions. The bar under the preview shows the size in millimetres, and your slicer shows the same numbers. Height is how far the shape stands above the base.
Is my image uploaded?
No. The image is read and turned into a model by your browser, on your device. Open the developer tools, go to the Network tab and convert an image: no request carries it. Once the page has loaded, it works without an internet connection.